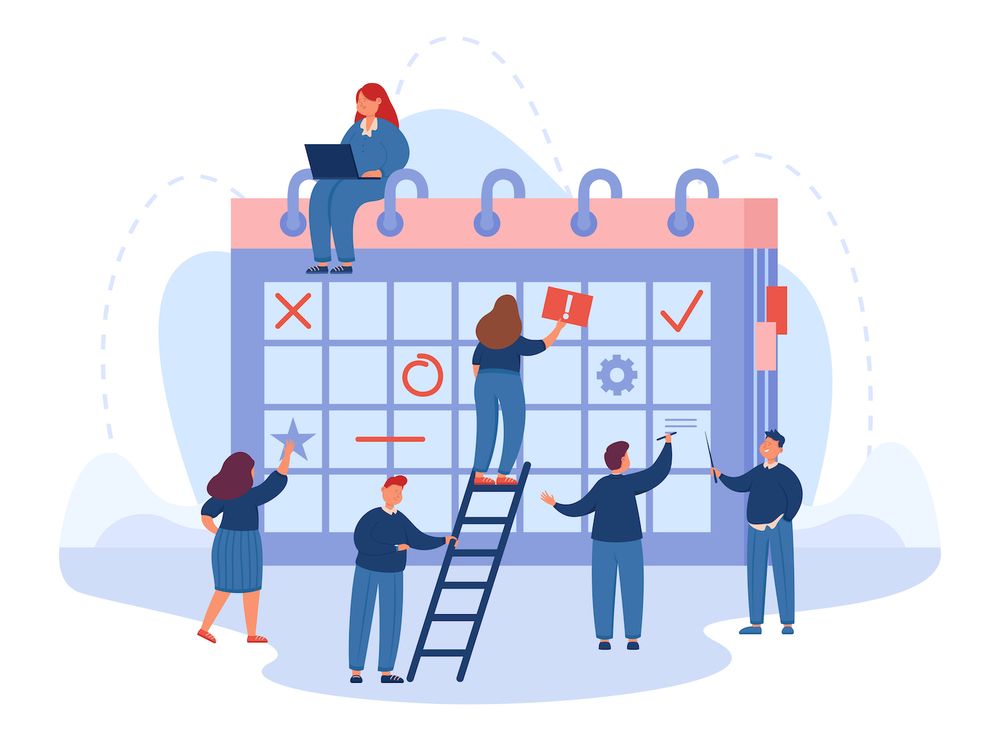
What is a WordPress Staging Site and How Do You Create One?
One of the best ways to accomplish this is to use a WordPress staging website (also referred to as a staging environment) it is a site you utilize to experiment and test large-scale changes. Therefore, if the modification is made breaks something -such as adding a new plugin making changes to code, editing it, or changing themes the change won't impact your live site. That means you can continue to achieve sales, and you can provide an exceptional experience for prospective customers.
What is a staging site?
Staging sites are copies of your current site that are that are hosted at a different URL (also called a testing or staging URL). They're generally the final stage in the development process before rolling out a brand new website or significant changes made to an existing site. On a staging site, it is possible to test plugins, features, and designs without having to alter the live website.
Not only will your live store remain online when you do something wrong and you'll also be able to take the time to experiment and test and not confuse site visitors.
Key components of staging sites
Your staging space should be as close to an exact replica of your actual location as you can, there are a few important differences.
- The site you are using live will be hosted on "yourdomain.com", and your staging website would need to have a new DNS name (e.g. yourdomainname.staging395312.com).
- The staging area you choose to use should not be public-facing.
- Depending on how you set up your staging site depending on the configuration of your staging site, you might have to replicate manually certain elements of your live site for instance SSL certifiies, PHP versions, and other server settings.
What kinds of modifications should I make with a staging site?
If you're fixing a typo or updating a price for a product or making minor changes to your site It's probably not going to be worth copying your live site over to a staging system and then making the necessary changes then deploying it back and again. Simply make the changes to your site live then continue your work.
You should use the staging area when you make these changes:
- Manually updating plugins, themes, or WordPress core
- The addition of new plugins
- New functionality can be added to existing plugins
- The process of making major design and text changes to existing pages and posts
- Redesigning your site entirely
- Switching payment gateways or making some other important changes in functionality
Where is a staging website is it hosted?
Stage environments are generally run by a hosting company -- typically similar to the one hosting your website live. It is possible to create a single-click staging site through your host or create one yourself using a hosting provider and then use localhost for your personal machine.
Here are some benefits and drawbacks to each type of stage site:
One-click staging
Pros:
- It's quick and easy to set up from your hosting company's admin panel.
- It usually comes with one-click live deployment.
- It automatically generates the staging URL. This means you don't have to purchase an additional domain to run tests or play around with subdomains and DNS.
- It's normally part of your hosting package and there's no added expenses.
- The system automatically changes URLs for root in the database of the staging site.
- It's easily accessible to collaborators.
- Search engines are automatically disincentive from crawling web pages.
- It makes use of a secure connection via a secure https:// network connection.
Cons:
- A few hosts use plugins for one-click staging deployment , which may conflict with your theme or other plugins on your site.
- It is not your responsibility to have influence over the methods used to create the staging area.
Manual staging of a website host
If you do not have hosting that supports one-click staging, or aren't happy with the way that your host's provider set up their staging platforms, you can still set up your own.
Pros:
- You control how you copy your live site to the stage environment.
- You can choose your own test URL.
- It is possible to choose any hosting company you want.
- It's accessible for collaborators.
Cons:
- It takes longer to setup and deploy the live website.
- You may need to cover an additional host and domain registration fees.
- Your SSL certificate may not be automatically enabled on your test domain.
- This is more likely to mistakes.
- Your hosting provider may not allocate enough resources for rapid deployment of an existing staging site into live websites. This happens most often with shared hosting plans.
- It is necessary to manually verify "Discourage the indexing of search engines on this page" in WordPress' Settings-- the Reading.
- It is necessary to turn off your staging site unavailable to anyone else with a maintenance mode or privacy plug-in.
Staging and staging with localhost
Localhost staging is a great option if you're used to creating locally and do not have to work with a large group of people for testing. However, it has quite a few drawbacks that are worth keeping in mind but.
Pros:
- It isn't necessary to connect with the Internet to work on or test certain aspects of your website -- you can work during a trip, during the subway or while camping amid the desert.
- The site you are using may load more rapidly than it does on your host, making your development and testing speedier.
- Your test site is secured and is not accessible to the public by default.
- There is no extra domain registration or hosting fees.
Cons:
- Initial localhost setup is time-consuming and a fairly technical process. If you're trying to deploy a staging site quickly and you've never created locally before, this option isn't the best option.
- It is more time-consuming to set up and re-deploy to your live site than with a one-click staging site.
- It is necessary to manually install an SSL certificate.
- When you deploy to live sites, it can be more prone to mistakes.
- You won't be able to check the transactions of a payment gateway as well as notification emails or any service that is connected via API without an internet connection.
- It's not very accessible to collaborators.
How do you set up the staging site
In this section, we'll cover how to set up a staging web site with your host, manually, and using a plugin on hosting environments. These steps should also translate to setting up a staging site on localhost. If you're new to the localhost platform, Jetpack offers an article that provides good tips for developing localhost tools.
Before you start
However you choose to create your staging location ensure that you've got:
- A staging domain is linked to your web host. Certain hosting providers may allow you create brand new sites using test URLs they control. Others may require that you use your own bought domain. If you're using a URL you own, be sure you connect it to the hosting account via the DNS record.
- Login details for your hosting control panel. These details are usually the same as the details for logging into the hosting account you have. If you're not sure, consult with your hosting company.
- Secure file transfer protocol (SFTP) Credentials. These can be located in your hosting control panel. If you're unsure where they are, you can ask support from your host. The information you'll need are:
- Host (your live server's IP address)
- Username
- Password
- Number of port
Although you may use a plugin to copy your live site to an environment for staging however, it may not go smoothly. It is best to be ready to move your website manually. For this you'll require an SFTP program like:
| Application | System | High-Quality or Free |
| WinSCP | Windows | Free |
| Filezilla | Windows, Mac, Linux | Options for premium and free |
| Cyberduck | Windows, Mac | Free |
| Transmit | Mac | Premium |
This example will make use of Filezilla however, most SFTP clients work similar to Filezilla.
Set up an WordPress staging site with your hosting provider
A lot of hosting companies offer single-click staging, specifically as part of controlled WordPress plans. This is the easiest method to create a staging site because your host takes care of all the chores for you. They can also provide support should you run into any difficulties.
What steps you'll need to follow will differ based the provider you choose, so go through their manual to get all the information you'll need. For this instance we'll create a staging site with Siteground.
Within your Siteground account, go to the websitestab and then click the Site Tools beneath the website that you would like to duplicate. Visit WordPress Staging.
In the Select WordPress Installation dropdown, choose the site you're working on. Then, add a name for your staging site and then click to create.

If you have files located beyond the normal WordPress setup (e.g. custom JavaScript) e.g. customized JavaScript A pop-up appears asking you if wish to incorporate them in the staging setting. Include them if they're a component of your website's function or style. It will be different for every configuration. Then, click Confirm.
And that's it! The staging site through the same location in the control panel, and then push the changes onto your live site with just a couple of steps.
The process of setting up a staging site with a plugin
If the hosting service you use doesn't offer staging, using a plugin to create a backup of your live site and migrate to a staging system is the ideal choice. Not only is it more efficient than manual processes, it's less time consuming and results in fewer mistakes. We'll use this WordPress Staging plugin to illustrate this however, other choices include Jetpack, BackupBuddy, and Transferito.
The process for each plugin will differ If you choose to go with something other than WP Staging You'll need to go through the documentation for the plugin before you begin the procedure of moving. But, prior to any action, back up your live site!
After installing and activating the plugin, head to WP Staging and Staging Sitesin your WordPress dashboard. There, you can choose the sections of your database as well as the documents you wish to incorporate in your staging environment. All of the options will be chosen as default and this is the ideal choice for the vast majority of websites.

Now, click Start Cloning. The time required to build your staging website will differ based on the size. However, the plugin will inform you during the entire process.

When the process is finished then you're all set! The instructions will be provided for accessing the staging version and log in using the same credentials as your current site.
You'll require the Premium version of this plugin to transfer changes from staging live. If you're not an expert in development and do not use staging tools as part of your hosting plan however, the user-friendliness is probably more than worth the cost.
The process of setting up a WordPress stage site by hand
The following steps depend on the hosting service that utilizes cPanel. If your hosting provider uses an alternative like Plesk or an alternative control panel, these steps should still be quite similar. If you're not sure it's possible to find assistance in your hosting provider's help documentation or by reaching out directly to their customer support team.
Step 1: Make backups of your current website.
Take one backup of your current website before beginning to copy your site to staging just in case something goes wrong.
Second step: copy your file from your live server onto your desktop
You'll require an SFTP client as well as login passwords. If you're not sure of what these are, ask your hosting provider.
- Log into your website server with your SFTP client. Use the credentials supplied to you by your hosting provider for Host username, password, username and Port fields.

- Go to a directory on your system where you want to download your website's content. In most SFTP clients, the local files appear in the left pane while servers from external sources appear on the right.

- Open the directory public in your server (right pane) . This folder is usually called ' public_html' or ' http://www.' The directory name can vary, however, so make sure to check with the hosting company if you're unsure.
- Pick all the files in the right pane, and then drag them over to the left pane. This could take a long time depending on how many files you have and your connectivity speed.
Step 3: Export your live site's database
After you've transferred your files from your live server to your desktop, you'll be required to export your database and transfer it to your staging environment. If you attempt to access your staging site prior to import your data, you'll be presented with an error message saying 'problem connecting to database.'

Contrary to WordPress files, the database is not accessible through SFTP as well as the cPanel files manager. To connect to and export your database, you'll need PHPMyAdmin. You can find phpMyAdmin in the cPanel section under Databases.

In phpMyAdmin:
- Select your database.
- Click the Export tab.
- Select Quick as the export method, choose SQL as the format, and select Go.

The process will create an .sql file onto your PC. Take a note of where it is, because you'll need to import this onto your staging website server.
Step 4: Transfer your live site's database into your staging server
To upload your live site's database, you'll have to build a completely new empty database on your staging server.
- In your hosting control panel Go to the Databases Section and select MySQL databases..
- Create a brand new database. This database is called 'tutorial_mydb.'

- Make a database user. In the MySQL Users section, create a new user. Make sure you choose an individual user name (not "admin" (again- get imaginative) and a strong password.

- Add the database to the user. Within the Add database user section, click on the user and the database that you created earlier, and then press Add.

5. All rights must be assigned to the account of the user and click Make Changes.

Voila! Now you have a completely blank database, which you are able to connect your live website's database.
5. Edit your wp-config.php file
The wp-config.php file contains important information about your database. The file links WordPress to important data such as the content of your posts, post meta users, theme and plugin configurations. The wp-config.php file must be updated with your staging server's database information in order that your staging website can connect to your database.
- On your computer, find the backup of your wp-config.php file that you downloaded from your live web site. Then, open it in a text editor of your choice, like VS Code and Notepador ++.
- Go to the mySQL area of the file and replace your live site's database details with those you just created.
// ** MySQL settings - You can get this info from your web host ** // /** The name of the database for WordPress */ define( 'DB_NAME', 'yournewdatabasename' ); /** MySQL database username */ define( 'DB_USER', 'yournewdatabaseuser'); /** MySQL database password */ define( 'DB_PASSWORD', 'yournewdatabasepassword' );
Some wp-config.php files also contain the following line:
define('WP_SITEURL', 'https://yoURLivesite.com'); define('WP_HOME', 'http://yoURLivesite.com');If you see these lines in your file then you'll have to alter them to match the URL of your staging server.
- Save your wp-config.php file and replace it with the one you uploaded to your server's web page by dragging and dropping it over via your SFTP client.
Step 6: Import your live site's database
- Visit the phpMyAdmin page from your website server. In cPanel, you'll find this under Databases.
- Select your newly created database and then select the Import tab.
- Select Select File and find the sql file that you had exported previously.

4. Select Go to begin the process of import. Depending on the dimensions of your database it might take a little longer to complete the import. When the import is completed then you will be able to see your entire database table in the upper left.
Step 7: Edit the root URLs in your site's database
After your database is transferred, you'll have to replace all instances of the URL for your live website with your new staging site URL.
- Open phpMyAdmin and select your database.
- Select your wp_options table. Tables usually appear to the left.

3. Once opened, you should see the first two options. Look under the option_name column to see the labels websiteURL and the home.
4. Double click on the siteurl and the value for home under the value_options column. Change both of these to your staging URL. Be sure to not add a forward slash (/) to the right of your URL.

5. Start your browser, and input your staging site's URL. Add /wp-admin/ after it (e.g. https://yourstagingsite.com/wp-admin/). It will take you to the login page.
Step 8: Flush your permalinks
Permalinks are permanent URLs of posts and pages on your site and also their structure. Sometimes your post and page links won't function when you are staging your site, in the event that you do not flush your permalinks first. This is a simple procedure.
- On your staging website's WordPress dashboard, go to Settings Settings - Permalinks.
- Click Save Changes. It shouldn't require you to modify any settings.

Step 9: Search and replace your live site's URLs with your database
The site you're working on probably has at least a few self-referencing links that use the URL of your root. For your staging site, you don't want those hyperlinks to be pointing back to the live site, so it's necessary to search to replace them. The most secure and reliable method to do this is with an application. For this example, we're making use of Better Search Replace. Better Search replace plugin.
Reminder: before doing anything to your database, make sure you take backups.
In your WordPress dashboard:
- Click here to go to Plugins and Add New.
- Search for Better Search Replace.
- Select Install Now and activate.
- In your WordPress Dashboard, navigate to Tools - Better Search Find and Replace.
- Fill your field Search Forfield by entering your live website URL (e.g. livesite.com).
- Complete the Replace with field with your web server's URL (e.g. stagingsite.com).
- Pick the databases tables you want to perform the replace or search on. In most cases, it is just necessary to apply it to the WP_Posts and the wp_postmeta tables.
- Check the run as dry?.
- Click Run Search/Replace. Dry runs mean that this will make no changesbut will give you the number of modifications that are made when you do actually execute the search/replace.
- Look for any changes. If the dry run has been completed, you will notice a variety of modifications. If not, it's possible that you need to check your URLs. If you're sure that your URLs are valid and you're still unable to be changed it's not necessary to change anything else and you can remove the plugin.
- If there are changes to make, uncheck the Dry run? option and click Run Search/Replace.
- Remove and deactivate Better Search Remove. When the search and replace process has been done and you've verified whether the website is functioning correctly, you can deactivate and uninstall the plugin.
Stop for a moment and get a cup of coffee. You've completed the stage setup manual and you're now ready to start investigating, testing and conducting tests!
Test your staging site for errors
No matter the method you employ to create your staging website, you should test it in order to ensure that nothing has gone awry in the process of setting it up before you check it over again once the changes you've made and upgrades. What you can examine will vary from site to website, but here's a checklist of some questions you can ask in the process of testing
Front-end:
- Does the website appear as expected on both desktop and mobile?
- Are all links working?
- Are interactive elements operating properly (e.g. carousels, buttons, accordions, pop-ups)?
- Can you submit forms? Did you receive the forms?
- Are you sure that your Cart and Checkout pages work properly?
WordPress dashboard:
- Do your dashboard pages load correctly?
- You can edit or add pages, posts, or other products?
- Does your site have the ability to be found in search engines? Click Settings and then Reading and check that you block search engines from indexing your site is not checked.
- Does your theme and plugin pages and settings function?
- Can you install new plugins?
Make sure your site is secure and ensure that you avoid any the possibility of downtime
No matter which option you select, test out any significant updates or changes made to your site in a staging environment instead of directly on your live site. By doing this, you can protect your live site from problems from new plugins, prevent delays due to errors or conflict, and also ensure that your users enjoy the same seamless and uninterrupted users experience.